 |
||||||||||||

| ||||||||||||
COMPUTER TIPS |
||||||||||||
CUSTOMIZE YOUR TOOLBARSo to that end I always try to drag everything about so that I can work in the way I want and not leave things as someone else decided. A really cool thing to do is to customise your toolbar. I'm using XP but these same tips work in much the same way for most Windows OS (Operating Systems). I'll demonstrate on an open folder, but you'll find that the icons and toolbars you have are customisable in lots of programmes once you know how. eg. Internet Explorer, Outlook Express, Word, Winzip. The Basics:Menubar = that thing at the top of a folder with File, Edit etc written on it.Standard Buttons = the bar with the little icons that let you do things. Address Bar = the place that shows the path of a folder which you're working in, or the address of a website you're visiting. First things to learn:* Right-click after the word "Help" on the Menu bar.* Make sure that "Lock the Toolbars" does not have a tick/check by it. * Make sure that "Standard Buttons" and "Address Bar" have a tick/check by them. * Click if there's no tick. * NB. To hide a toolbar click on the menu to remove the tick. 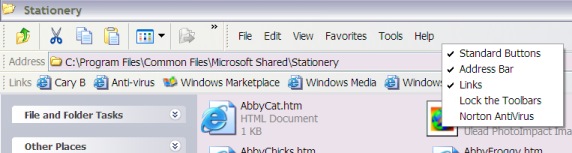
How to drag the separate bits about so you can place them where you want them.1. Move your mouse so that the pointer hovers over the little dotted line you can see in the image below.Your pointer will turn into a double-headed arrow. 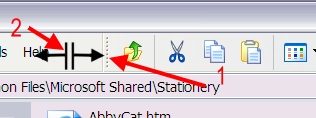
2. Press your left mouse-button and hold it down, your pointer will change to the shape indicated at 2. Hold it down and drag the bar to where you want it. You can arrange the bars in the way that suits you best. Don't panic if you can't get it right at first. Just keep pulling the different parts about with your mouse and you'll soon get the hang of it. Don't be too tentative, just drag and drop. Slide the bars along if they're obscuring each other. Always move them by grabbing the dotted division at the left edge of the toolbar. You can arrange things in the best way you like them. Here are a few variations: 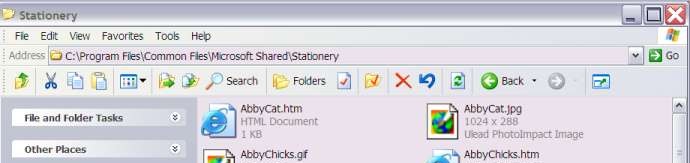


Customize your buttons* Make sure that your Standard Button bar is displayed, then right -click in a space on it.* Click the "Customize" item on the menu. * You'll see this dialogue box: 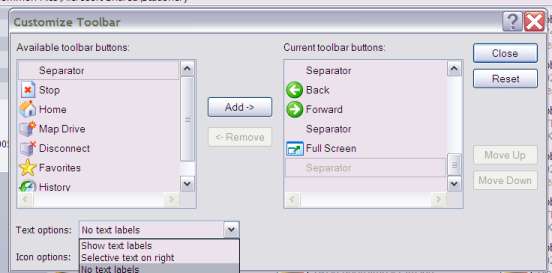
Now lets decide if we want labels next to our icons You can choose from Show text, selective text and no text by clicking the downward-pointing arrow. Below you can choose large or small icons. Now comes the really fun part - Adding icons to your button bar. To do that follow these steps: * Click the icon you'd like in the left hand box. * Click the "Add" button. * Click the "Move up" and "Move down" buttons to position the icon where you want it. * Click Close. * Voila! You have some new buttons to click. |
||||||||||||
| ||||||||||||